Technical Library
HTML5 Text Fields
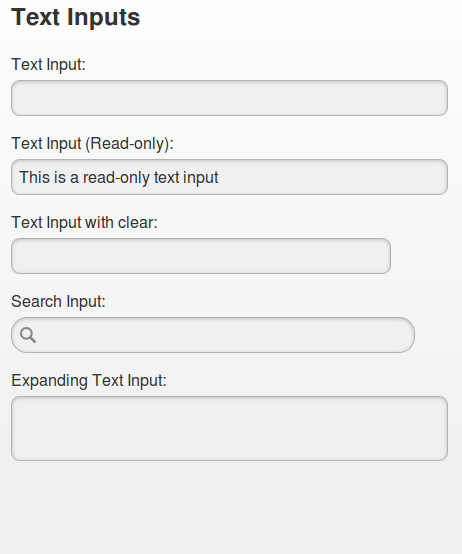
Text Field UI elements enable users to enter text into an application. There are five types of Text Field UI elements:
| Type | Description |
|---|---|
| Standard | When more text is entered than the field can display, all characters are shifted to the left and new characters appear on the right. When more text is entered than the field can display, all characters are shifted to the left and new characters appear on the right. |
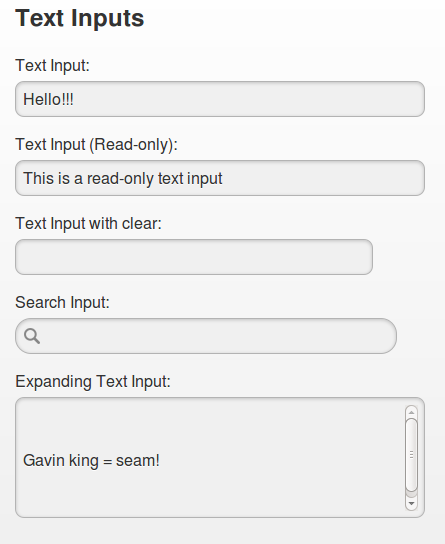
| Expanding | When entered text reaches the end of the field, the field expands vertically by one line, until it reaches a configurable number of lines. |
| Editable | Text content can be switched from a read-only mode into an editable mode. |
| Search | A search icon appears at the beginning of the field |
| Clear Text Input | A button appears on the right which when it is clicked, the entered text is cleared. |
 |  |
|---|
Creation of Standard Text Fields
For creating a standard text field add the following code:
<div data-role="fieldcontain">
<label for="name">Text Input:</label>
<input type="text" name="name" id="name" value="" />
</div>
Creation of Editable Text Fields
For creating a editable text field add the following code:
<div data-role="fieldcontain">
<label for="name">Text Input (Read-only):</label>
<input type="text" name="name" id="name" value="This is a read-only text input" readonly="readonly" />
</div>
Adding the readonly="readonly" attribute to the input component, the textfield becomes read-only and grayed out.
Expanding Text Fields
For creating a expanding text field add the following code:
<div data-role="fieldcontain">
<label for="textarea">Expanding Text Input:</label>
<textarea cols="40" rows="2" name="textarea" id="textarea"></textarea>
</div>
Note that the html component in this case is a text area, and not a input field.
Search Text Fields
For creating a search text field add the following code:
<div data-role="fieldcontain">
<label for="search">Search Input:</label>
<input type="search" name="search" id="search" value="" />
</div>
Here we are using the html5 input type="search". The search icon is automatically added on the left.
Clear Text Input
For creating a clear text field add the following code:
<div data-role="fieldcontain" class="ui-field-contain-clear-input">
<label for="name">Text Input with clear:</label>
<input type="search" name="search" id="search" value="" />
</div>
The class="ui-field-contain-clear-input" is required in this case to make appear a 'X' button on the right. This button clears the entered text.
Full code
<body>
<div data-role="page">
<div data-role="header" class="ui-bar-a ui-header" role="banner">
<a id="backButton" href="/index.html" data-icon="arrow-l" data-theme="a">Back</a>
<h1 class="ui-title" tabindex="0" role="heading" aria-level="1">Form Elements</h1>
</div>
<div data-role="content" class="ui-body-c">
<form action="form.php" method="post">
<h2>Text Inputs</h2>
<!-- Standard text input -->
<div data-role="fieldcontain">
<label for="name">Text Input:</label>
<input type="text" name="name" id="name" value="" />
</div>
<!-- Standard text input (read-only mode) -->
<div data-role="fieldcontain">
<label for="name">Text Input (Read-only):</label>
<input type="text" name="name" id="name" value="This is a read-only text input" readonly="readonly" />
</div>
<!-- Text Input with clear button -->
<div data-role="fieldcontain" class="ui-field-contain-clear-input">
<label for="name">Text Input with clear:</label>
<input type="search" name="search" id="search" value="" />
</div>
<!-- Search Text Input with Clear Button -->
<div data-role="fieldcontain">
<label for="search">Search Input:</label>
<input type="search" name="search" id="search" value="" />
</div>
<!-- Expanding Text Input. You can add a maxrows parameter to define the maximum number of lines which it extends -->
<div data-role="fieldcontain">
<label for="textarea">Expanding Text Input:</label>
<textarea cols="40" rows="2" name="textarea" id="textarea"></textarea>
</div>
</form>
</div>
</div>
</body>