AT&T Video Optimizer
Image Compression
Introduction
Images are a great way to present your message, sell your product, and make your mobile application and website look great. There is a cost to images though. Images can be very large in size, and that means that they can take a long time to download, lowering the performance of your application.
So, what can you do to balance the delivery time of images with the benefit that images provide your application? In this best practice, we’ll look at how compression methods can be used to reduce the download size of your images – speeding up delivery and helping your app run faster.
Background
Image compression is a way to squeeze data from your images, speeding delivery, and using less data. The trick with image compression is that JPEG images are lossy – when you reduce the data in an image, you lose image quality.
In this best practice, we'll look to balance image quality and image size to give your application the optimal user experience.
The Issue
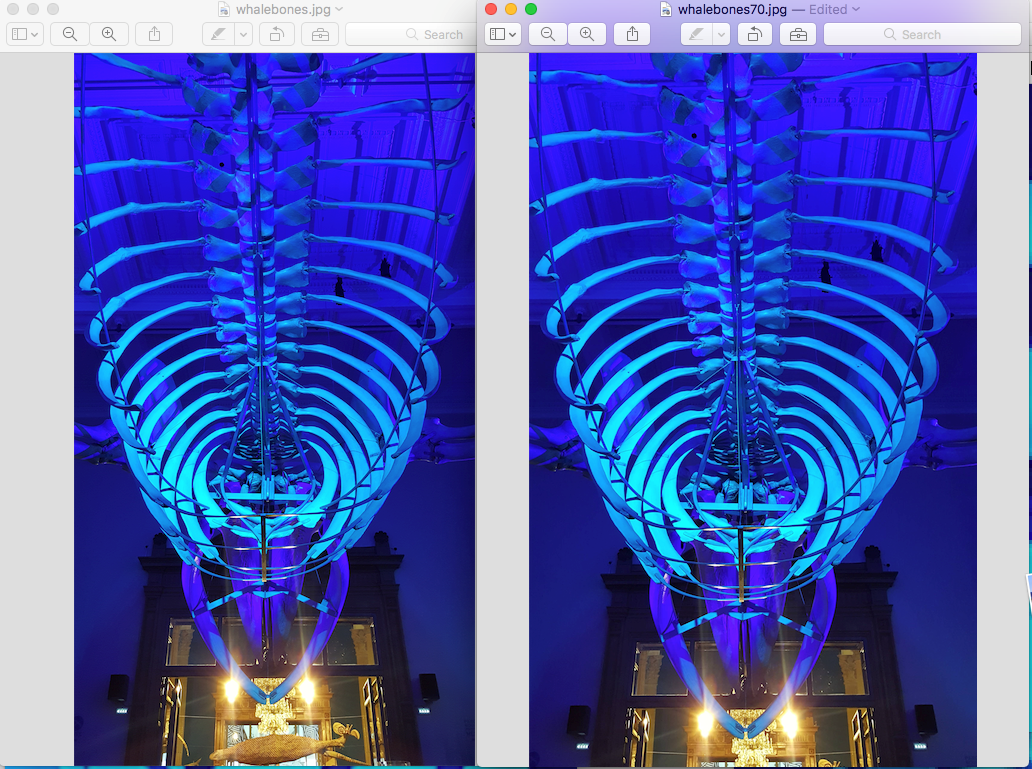
Compressing JPEG (and other lossy formats) causes a reduction in the number of pixels saved, and can reduce the image quality. Each image will optimize differently, and depending on how the images are used in your application, you may utilize different compression ratios. However, it is widely held that JPEG images saved at 85% quality strike a good balance between image quality and compression. Some images can be compressed even further while maintaining quality. For example, this image of a whale skeleton at original (left) and at 70% quality (right) are hard to distinguish:

The image on the left is 6.6 MB, while the image on the right is 1.1MB – a savings of 83%, and there are only minor changes in the image quality.
Best Practice Recommendation
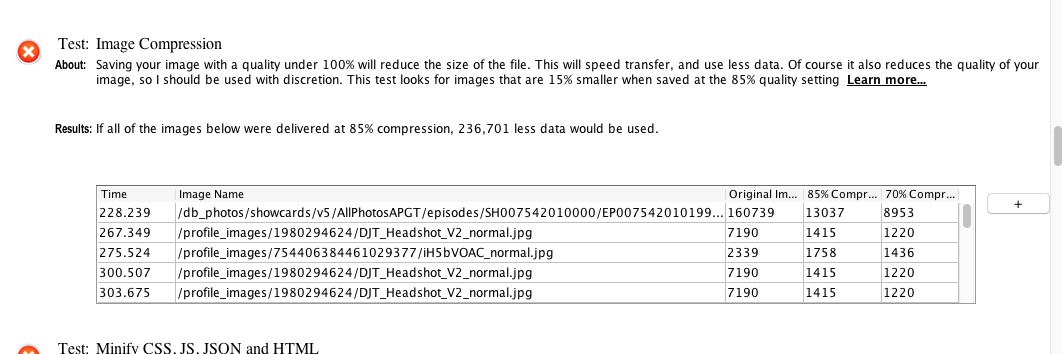
Video Optimizer will detect all JPEG images, and resave them at 85% and 70% compression settings. If the 85% quality image results in a file that is at least 15% smaller, the best practice will trigger a failure on that image. Video Optimizer will also report the potential KB savings if all images that fail were delivered at 85% quality level. In the following screenshot, we see that the images could be a cumulative 236KB smaller at the 85% quality setting, and even smaller at the 70% setting.

Your Video Optimizer trace will also now contain a folder named ‘images’ with all of the images that fail this best practice (and their 85% and 70% counterparts) if you would like to do further comparisons.
We recommend using the maximum image compression possible to balance good image quality with fast delivery. Generally, this will fall around 85%, but you should test representative images with your compression tools to find the best balance.